Stockwhip handles

Le'me see... Whips, whips and - whips!
User avatar
Jeff Roseborough
Member
Posts: 1661
Joined: Fri 3. Jul 2009, 09:12
Location: Reno, NV, USA

  Stockwhip handles

Post by Jeff Roseborough »

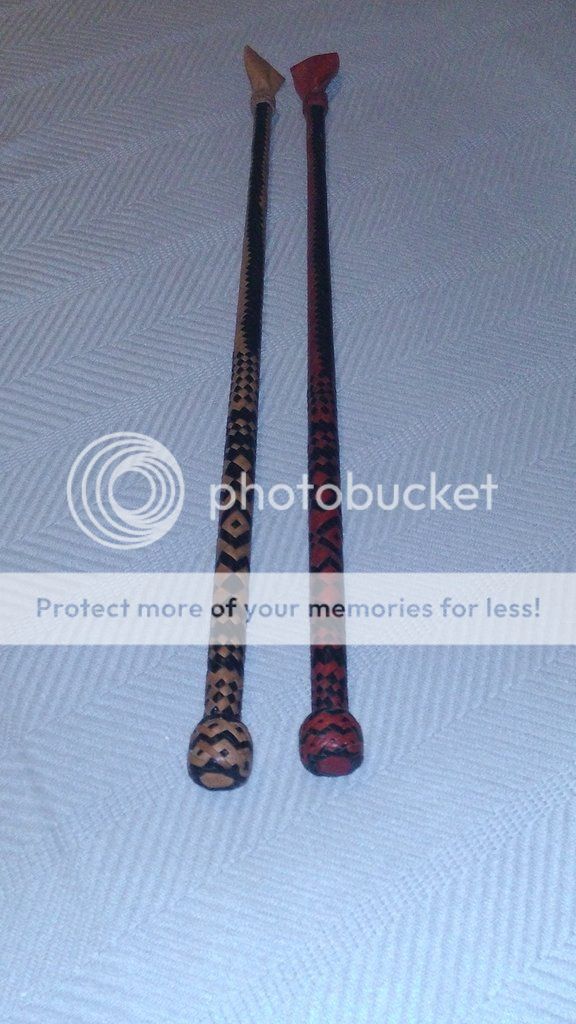
I thought I would post a few pictures of my current projects. I have been working on a 3 stockwhips along with the Whip Swap Whip.
The somewhat matched pair two toned handles will be for my own use. I will add 4ft thongs to them. I want to learn two-handed routines.

Image

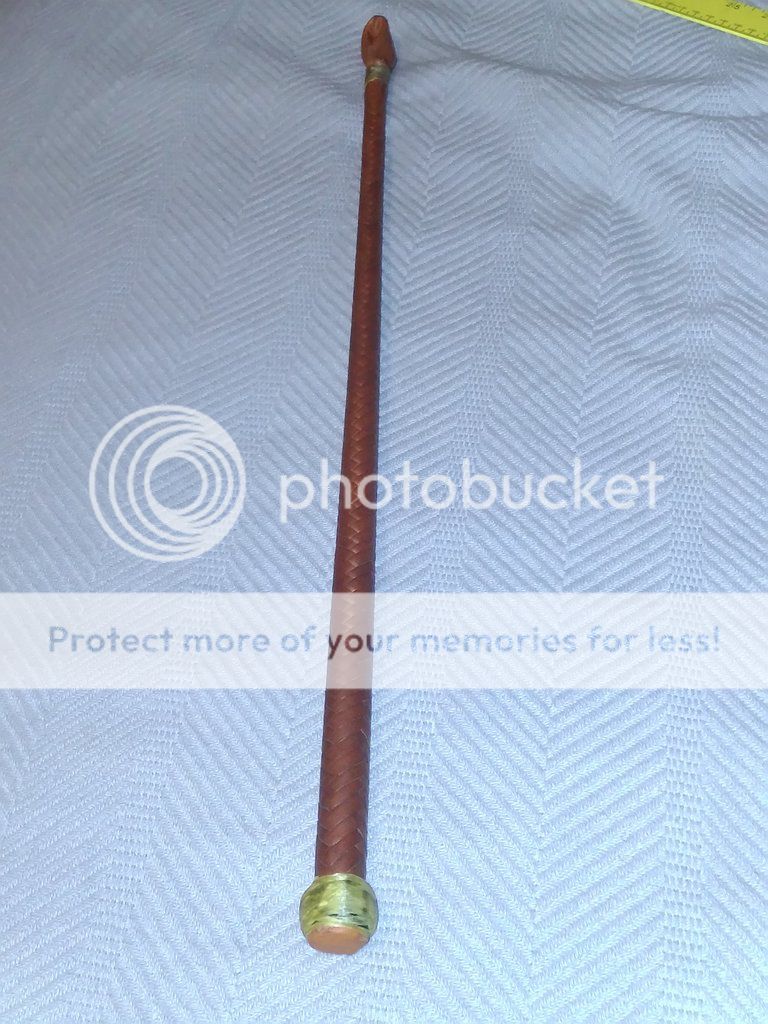
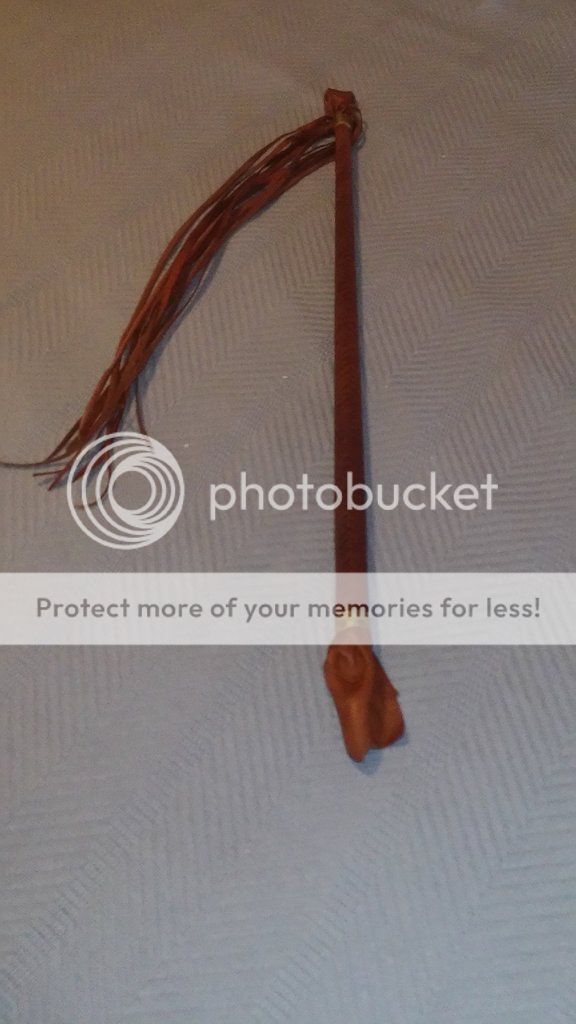
This next handle is in progress. It is for an order I received a couple of weeks ago. It is going to be a 12plait 6ft stockwhip in saddle tan. I completed the plaiting on the handle but still need to trim the strands, build up the butt foundation, and tie on turks head knots. The keeper is already attached.
Image
Here's wishing you find time for the things you want to do, and for the things you need to do.
We see ourselves in our children and hope for a better future.
Chris Castle


Post by Chris Castle »

Man Jeff, those are very pretty!

I'm seeing a bit of a twist in the plaiting toward the keeper on the tan one - is that intentional? I've not tried out fancy plaiting yet...was considering trying it on the swhip ship whip.

Was wondering also if you are beveling just one side of your strands like \__/ or both like <__>? In the photobucket album there is a black handle with gorgeous fit on those strands!

-C
User avatar
Rachel McCollough
Member of the Ring
Posts: 9865
Joined: Tue 21. Apr 2015, 11:37
Location: South Mississippi, USA
Contact:


Post by Rachel McCollough »

Jeff, beautiful!!!!!! You make us drool! Oh man. The work that goes into those. One day.... One day I will try leather. That is beautiful.
Inch by inch.
Paul Slater


Post by Paul Slater »

Jeff I am currently reading Ron Edwards book on whipmaking and after reading the section on stockwhips I now have some idea of the amount of work to produce something with that level of detail in the plaiting.
They are a lovely pair of handles.
User avatar
Jeff Roseborough
Member
Posts: 1661
Joined: Fri 3. Jul 2009, 09:12
Location: Reno, NV, USA


Post by Jeff Roseborough »

Thanks all for the great comments. The twist was unintentional. I believe it creeps in if I stop halfway through. I should plait in one session for handles and whips.

I tried to match the patterns but there are a few mistakes along the way. The strands are a bit wider so the pattern is stretched out a bit. It doesn't matter much to me as these will be for my own use. I could also sell them separately with no problems.

I beveled the undersides "\___/" of strands. It helps to make them lay flatter. I also roll the heck out of the stock. The stock you saw in Photobucket may have been my Murphy stockwhip handle. I can only dream of doing work as good as he did.
Here's wishing you find time for the things you want to do, and for the things you need to do.
We see ourselves in our children and hope for a better future.
Paul Slater


Post by Paul Slater »

Jeff Roseborough wrote:Thanks all for the great comments. The twist was unintentional. I believe it creeps in if I stop halfway through. I should plait in one session for handles and whips.
Its strange you say that about the twist in your plaiting as I have also worked out the main amounts of rotation and twist on my whip is exactly the same as yours, the point where the rotation is worst is where I have clipped the strands and put the whip aside while I moved it out of the way and the rotation seems at its worst when I restart the plaiting.
User avatar
Robby Amper
Member
Posts: 4847
Joined: Tue 30. Dec 2008, 20:40
Location: Munich, Germany
Contact:


Post by Robby Amper »

What do you think, Jeff? When will you be able to post new pictures of your whip swap whip? I am more than excited and happy for the recipient of that whip! It must be such a great experience to receive a package, open it and then to see such a beautiful whip. I'm not jealous in any way for the lucky person who will get it. I am just happy that all this is working so fine!

Robby
I have a screwdriver. I am Legend...
User avatar
Jeff Roseborough
Member
Posts: 1661
Joined: Fri 3. Jul 2009, 09:12
Location: Reno, NV, USA


Post by Jeff Roseborough »

Robby Amper wrote:What do you think, Jeff? When will you be able to post new pictures of your whip swap whip? I am more than excited and happy for the recipient of that whip! It must be such a great experience to receive a package, open it and then to see such a beautiful whip. I'm not jealous in any way for the lucky person who will get it. I am just happy that all this is working so fine!

Robby

I am working on it too, just don't want to spoil the surprise!
Here's wishing you find time for the things you want to do, and for the things you need to do.
We see ourselves in our children and hope for a better future.
User avatar
Craig Frank
Member
Posts: 1233
Joined: Thu 23. Jul 2015, 21:06
Location: Arizona


Post by Craig Frank »

Jeff - I always love whips with different patterns mixed together. Can you please tell me the name of the pattern where you have one color surrounded by another in a square bullseye style? I've seen it before and have tried to mimic it without success.
If I can't run fast, I'll make slow look impressive.
"By the power of ibuprofen!"
User avatar
Jeff Roseborough
Member
Posts: 1661
Joined: Fri 3. Jul 2009, 09:12
Location: Reno, NV, USA


Post by Jeff Roseborough »

Craig Frank wrote:Jeff - I always love whips with different patterns mixed together. Can you please tell me the name of the pattern where you have one color surrounded by another in a square bullseye style? I've seen it before and have tried to mimic it without success.

If you have Edwards book it is a variation on "Egyptian Eyes". Where he has 1 eye connected with a double bracelet I put 2 eyes in a row. The basic pattern is a central dot surrounded by a 3x3 square in a different color, surrounded by a 5x5 square in the original color. On a 16 plait handle there are 2 eyes side by side sharing the left and right squares. This connecting square is the second color and different from the 5x5 square. I did this so I would not have a strand 9 squares long winding around the handle able to shift. The different color in the middle of the long strand holds it down.

I really didn't have a plan for these handles. I just did whatever looked good to me.

There is an online app that can help in plaiting designs. http://www.whipinfo.com/fancy/ It really helps planning out designs. You can try different colors (only 2) and see how different designs flow from one to another.

Also of interest when I made these matching handles I wrapped 1 color - 8 strands - tightly around the handle and then wove the other 8 strands through. It seemed easier than weaving strands 1 at a time from each side and working my way down the handle. For intricate designs it really is easy.
Here's wishing you find time for the things you want to do, and for the things you need to do.
We see ourselves in our children and hope for a better future.
Andreas Reich


Post by Andreas Reich »

Hi Jeff, thats very nice work. How do you make the Handles? Cane with a steelcore?
User avatar
Robert Gage
C Member
Posts: 13353
Joined: Fri 7. Feb 2014, 15:58
Location: UK


Post by Robert Gage »

Jeff, those handles look perfectly splendid! Thanks so much for sharing!
'Less is often more!'
Fritz Ehlers


Post by Fritz Ehlers »

Way to go Jeff,
thanks for sharing this, those handles look good.
Can't wait to see the whips. It's really cool because I remember your posts when you started working on leather and buying roo.
You've come a long way.
Very well done...
User avatar
Jeff Roseborough
Member
Posts: 1661
Joined: Fri 3. Jul 2009, 09:12
Location: Reno, NV, USA


Post by Jeff Roseborough »

Andreas Reich wrote:Hi Jeff, thats very nice work. How do you make the Handles? Cane with a steelcore?
I've tried the cane with steelcore and it is a pain in the behind if you don't have the proper tools. To put spring steel inside you either drill it in using the rod as a drill bit, or split the cane, drill a groove for the steel, and glue the rod back together. My attempts were mostly unsuccessful. I will use cane for half-plait handles with no steel inside.

My handles are fiberglass rods. I get them from the local hardware store. Normally used as driveway and street markers.

To get the taper I cover the rod with 6-8 layers of newspaper. The paper is secured with ducktape and then wrapped with sinew.

Bernie has a video here about how he makes them. I follow the same style.

https://www.youtube.com/watch?v=Okm3LqohhDU
Here's wishing you find time for the things you want to do, and for the things you need to do.
We see ourselves in our children and hope for a better future.
Andreas Reich


Post by Andreas Reich »

That´s very impressiv Jeff - such simple technic. And it works how to see. I think compact paper is hard like wood.
User avatar
Roy Partin
C Member
Posts: 3471
Joined: Thu 23. Jan 2014, 16:01
Location: Red River County, Texas
Contact:


Post by Roy Partin »

Thats sweet Jeff, thanks for sharing. I think I might know whom one of those lucky people is
He died for me, I'll live for him
Taylor Jennings


Post by Taylor Jennings »

Gorgeous. Still trying to work out the awesome heel knot patterns.
User avatar
Jeff Roseborough
Member
Posts: 1661
Joined: Fri 3. Jul 2009, 09:12
Location: Reno, NV, USA


Post by Jeff Roseborough »

Taylor Jennings wrote:Gorgeous. Still trying to work out the awesome heel knot patterns.
8x9 1 pass with an interweave. The pattern was kind of a fluke. I really didn't intend to have diamonds on the knot, it just kind of turned out that way. In fact the overall patterns were a fluke too. I just did whatever I thought looked good and tried to keep everything even. There are a few flaws here and there but since these handles are for my own use I can live with them.
Here's wishing you find time for the things you want to do, and for the things you need to do.
We see ourselves in our children and hope for a better future.
User avatar
Jeff Roseborough
Member
Posts: 1661
Joined: Fri 3. Jul 2009, 09:12
Location: Reno, NV, USA


Post by Jeff Roseborough »

Roy Partin wrote:Thats sweet Jeff, thanks for sharing. I think I might know whom one of those lucky people is
Roy, you would be correct in your thinking. Here are a few more pictures:

The stockwhip handle ready for knots:
Image

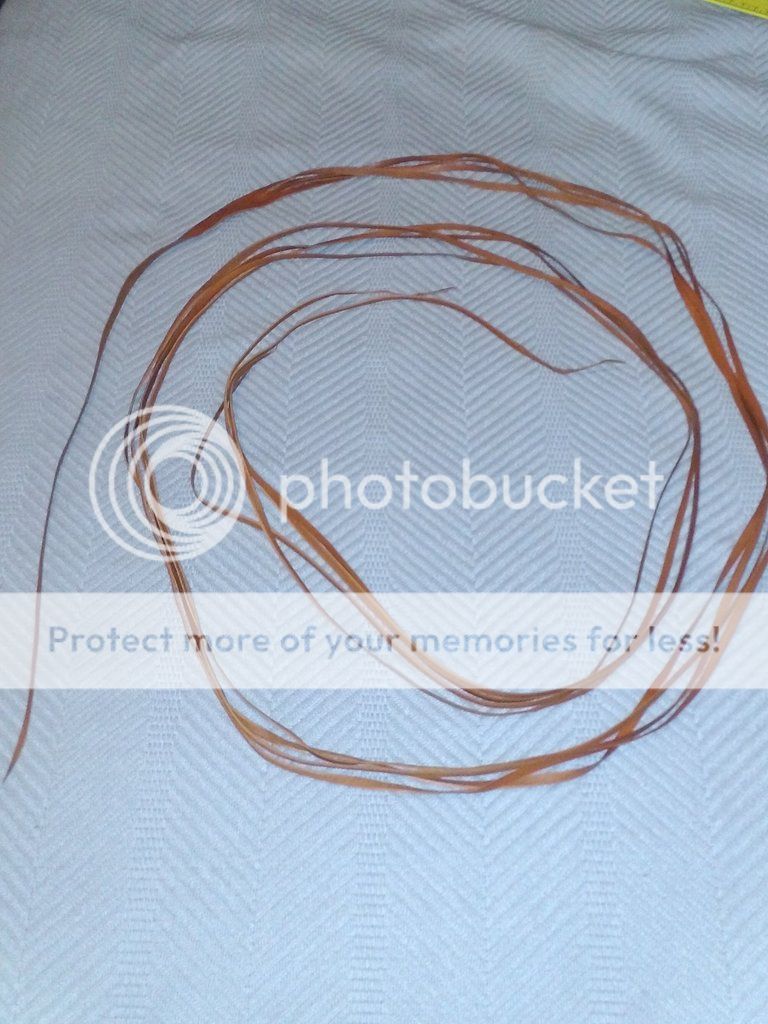
The core - 3 strands tapered and beveled:
Image

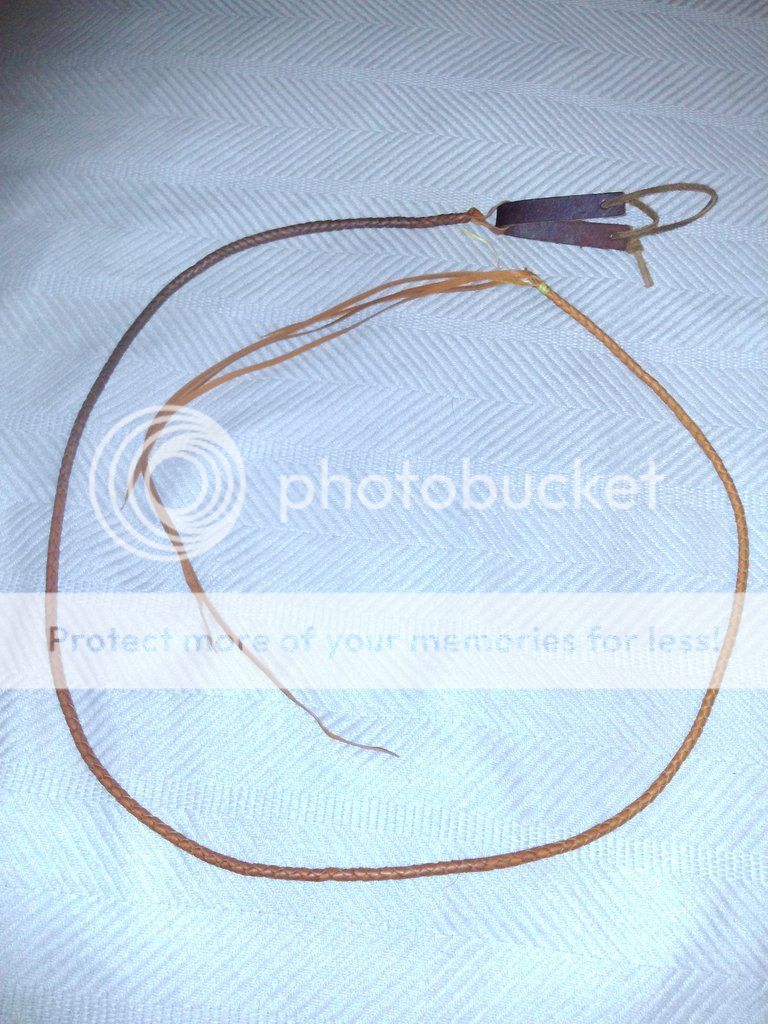
The belly - A partial bolster on one end that forms the keeper and 4 strands ready to be plaited. Just need to grease everything up first.
Image
Here's wishing you find time for the things you want to do, and for the things you need to do.
We see ourselves in our children and hope for a better future.
User avatar
Jeff Roseborough
Member
Posts: 1661
Joined: Fri 3. Jul 2009, 09:12
Location: Reno, NV, USA


Post by Jeff Roseborough »

I finally had some more time at lunch to work on 2 whips. I rolled both whips and cut out a bolster for a stockwhip.

This is the first belly plaited and rolled. The leather strap at the keeper end is to hang the whip from while plaiting, and is about the size needed for the keeper loop. The four strands remaining will be split into eight and evenly tapered.

Image

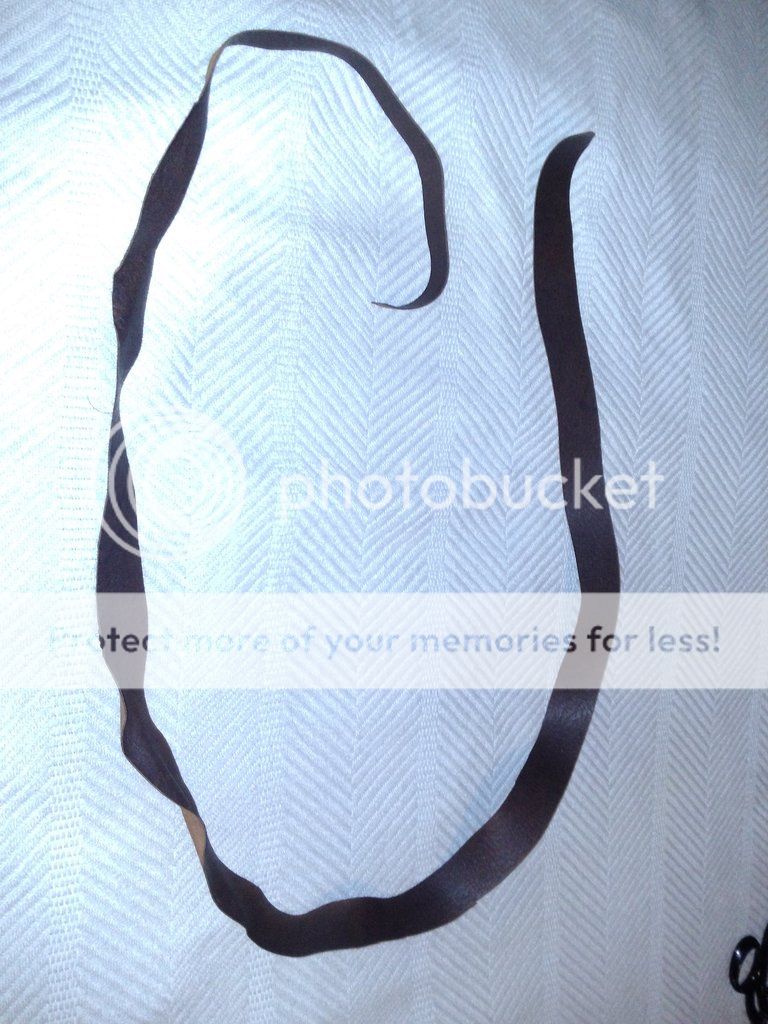
This is the bolster. I need to trim it a bit. I have some kangaroo leather that was too spongy for whipmaking or lace, but works really well for bolsters. A bolster's primary functions are to carry/add weight and fill in the gaps between layers. Some whipmakeers will use chrome tanned leather. This piece is veg-tanned.

Image

I may add a second bolster over the first to help define the swell of the thong.
Here's wishing you find time for the things you want to do, and for the things you need to do.
We see ourselves in our children and hope for a better future.
Post Reply

Return to “Whips (+++ public thread +++)”